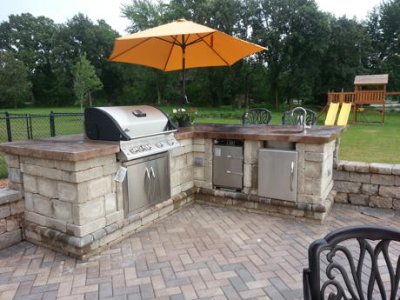
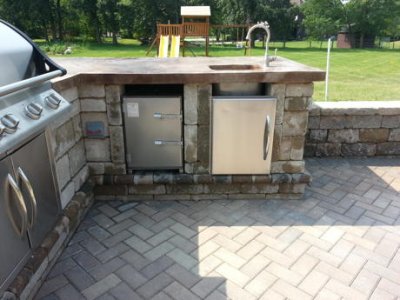
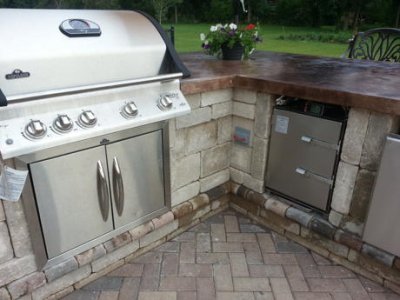
Hello everyone - for those of you wanting to put your smoker in a outdoor kitchen...well here's how I did mine...I hope the pictures load and look good..
I just bought a #2 model smoker 2 weeks ago. Ihavent posted yet cause I'm putting my smoker in a outdoor kitchen and I need to see the smoker first so I could work my kitchen around it. Well today I finished the kitchen and hooked up the smoker. For
Those of you who are wondering how this smoker can work in a kitchen here are my tips and pictures so you can do the same
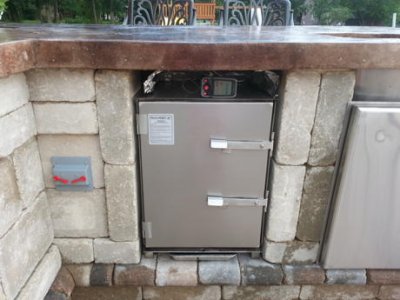
1) I had to find a way to get access to the top of the smoker so I left a opening in front of the smoker so I can stick my hand in and see the temperature gauge. This also allows me to drop my temperature probe into the smoker without cutting a hole in the counter top. You won't be able to see the entire tempature gage but if you buy a silver marker you can put dashes on the knob so that only you know what they mean so as your looking at the tempature knob you will see your dash marks and it gives you a rough idea where about you are. 2 dash marks to me means 200 degrees and that's all I need to know cause I can prety much guess and adjust up or down from there.
2) don't put the wheels on. The unit isn't that heavy and you can slide it around if you have to. By leaving wheels off you can have greater access to the top hole and see your temp gauge better.
3) You'll see in the picture I have tin foil on top of the smoker. I temporarily put that on top to help direct the smoke to the outside of the kitchen. You can bend the foil so the smoke rolls to the front of unit and bend the sides so the smoke dosent vere off to the side and get under your kitchen. I didn't do this before I seassond it and the under part of the kitchen was filled with smoke for a little while. Not a big deal though.
4) I also installed a switch to the left of smoker which leads to a wall outlet. I plugged my smoker in the outlet and now when I want to use the smoker all I have to do is turn the switch on and my smoker is cooking. I also decided to leave my tempature gauge at 225 degrees so I don't have to keep sticking my hands back there. I have my tempature knob lableld were 200 degrees is and were 225 is so I don't have to touch it, at least for now. I'm interested in buying the tempature box the forum talks about. That may help me out.
Over all I love the set up. I cooked my first set of ribs today. 3 slabs,3oz cherry wood, 6 oz of apple juice,and I rubbed ribs with the famous Dave's rub this forum talked about under the rubs section. I had my dial pre set to 225deg and flipped my switch. 5.5 hours later they were done. I spread famous Dave BBQ sause over them and that's it. They were awesome. Well worth the money for the smoker. Very well built. All I'm confuse about is how am i going to clean the inside. It got very messy.
If anyone has any questions I'll try to answer them for you. Thanks smoking-it people for a nice smoker
** I noticed the pictures don't show up when i reviewed my post unless i logged back in. Let me know if the 5 picture arn't posting and Ill try it again….
Brian N
Indiana USA


