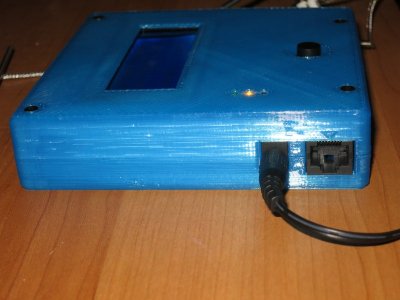
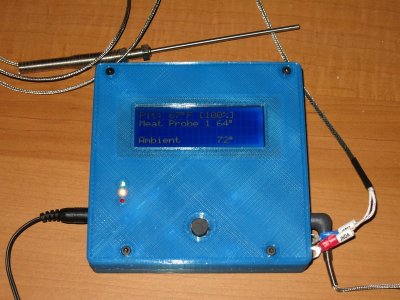
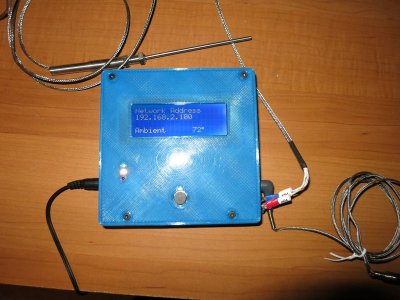
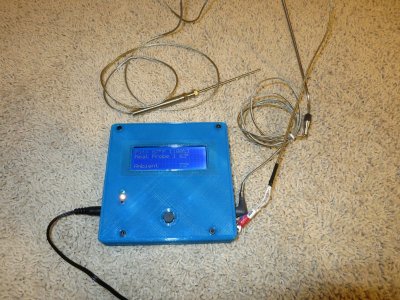
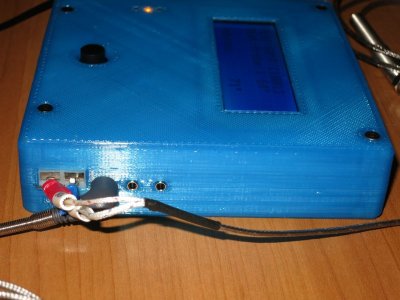
Starting a new thread to document my HeaterMeter PID Controller build plans/progress and give everyone a fixed location for reference if they feel inclined to watch, build, or buy a pre-made one themselves.
Background Information:
What is the HeaterMeter PID Controller?
A PID Controller is control loop feedback mechanism. In BBQ smokers it is basically a device with an algorithm that monitors temperatures of your smoker/pit and provides a method of controlling your heat to maintain your desired setpoint(s) as accurately and stably as possible. The HeaterMeter PID Controller is a development project started up by Bryan Mayland (aka CapnBry) that is geared for the Big Green Egg (BGE). This project is gaining traction and continually evolving with improvements and new adaptations due to the great community of developers and users. The current version I will use for the basis of this thread is v4.2.4. I applaud Bryan for the great foundation work he has provided and hope everyone here at smokingitforums can consider it a viable future option for their temperature sensor and PID controller needs. Please visit the following links to learn more about the HeaterMeter PID controller:
Why would I want one?
Most Smoking-It owners want to become king of "Lazy-Q", am I right? The HeaterMeter costs roughly $200 +/- $50 (labor and time costs to build excluded) depending on features and quality of components used in the building process. This is in the same financial investment ballpark as the current Auber PID's that so many users on this forum invest in. It is my belief (will know when I finish this project build) that the HeaterMeter will be more capable and feature rich than the Auber. Please be aware that this comes at the expense of more complex and challenging setup conditions. Once everything is setup and tuned it should be "smooth" sailing on the BBQ train while you drink more beers "slaving over dinner"!
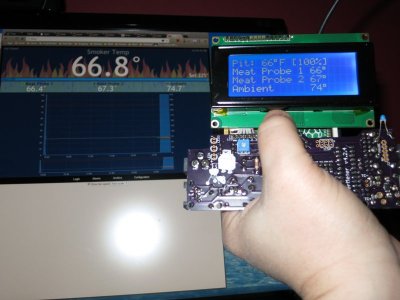
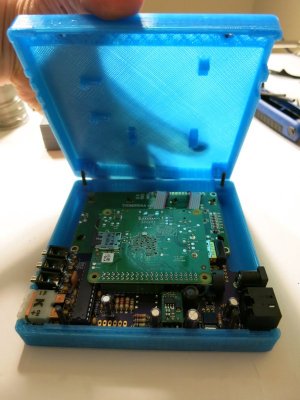
Here's a few previews of what's on the horizon:


HeaterMeter Build and Integration Plans:
4-Line LCD w/Thermocouple and 3 probe support
I settled on this configuration because I plan to modify my SI2 smoker to utilize a permanent "Pit" probe thermocoupler similar to what the Auber PID controller installers within this forum typically install in their units. I plan to maintain legacy analog and new heatermeter PID controller functionality by way of installing a bypass DPDT ON-ON waterproof switch. I wanted to dedicate a quality pit probe and 2 food probes for my smokes. Having the room for the 3rd additional probe port in the HeaterMeter was just icing on the cake. I really wanted complete visibility to my smokes through the LCD and Wireless (Wi-Fi) interfaces. This allows me to real time monitor my smokes anywhere/anytime so I'm not constrained to being near the BBQ all the time. Finally, I wanted to help the HeaterMeter project bridge the gap into supporting electric smokers through the addition of adding a solid state relay (SSR). This should really open up my "Lazy-Q" visions. And I love technology and tinkering so why the hell not try a project like this?
I want to be as open and transparent as possible so followers can make reasonable and accurate assumptions based on their experience levels, willingness to try new things, and budgetary estimates of what to expect based on what they have and need to make this a success. I knew going into this project that I would be spending a fair amount more than the standard costs because I needed some tools and things I haven't used in years (e.g. soldering iron and other electronic tools and supplies). I also realize I'll probably spend quite a few hours re-learning stuff I haven't used in practice since my college days. I hope to pay close attention and remember enough things that prevent myself from making any significant and costly mistakes.
Parts and Pricing - My experience
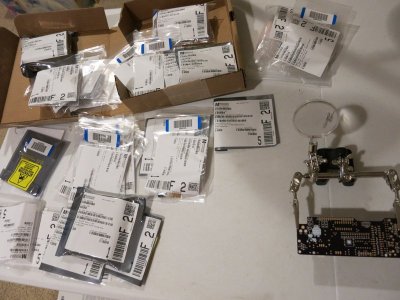
This is my total cost so far and I'm missing a case and one small part I missed, so add ~($30+$2). My numbers may not be reflective of others who may already have some of the expensive equipment like electronic supplies and thermo probes. Average kit should be around $200 to complete + some labor of soldering/debugging. I went with high end everything like 2 - Thermoworks food probe thermistors, Thermocouple that will permanent mount in my smoker, 4 line LCD, etc...
The HeaterMeter Build Process
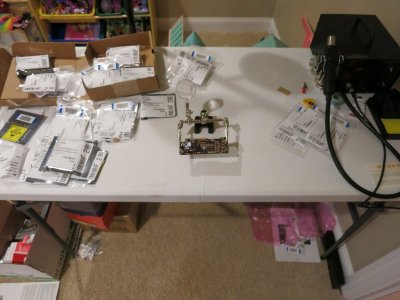
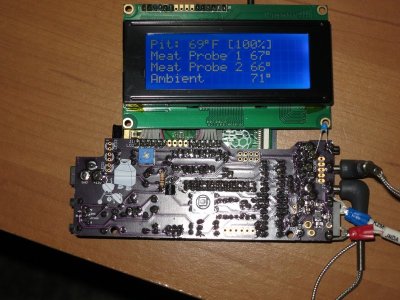
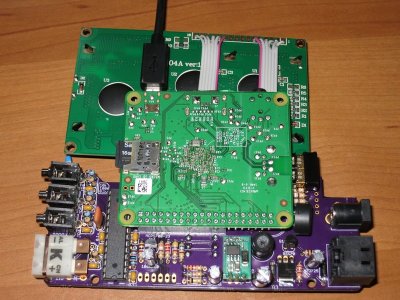
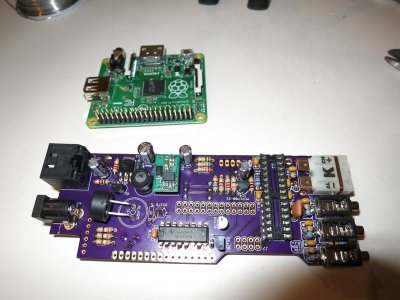
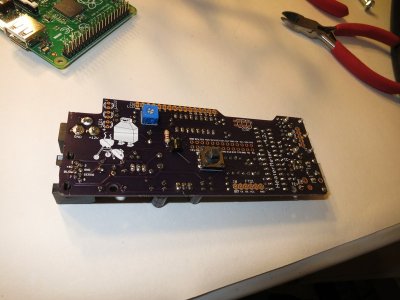
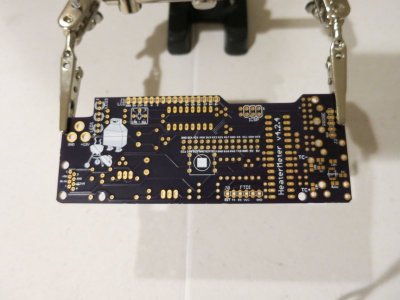
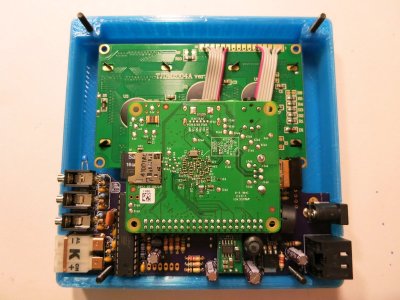
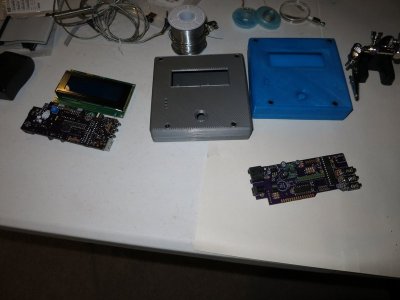
So I received the majority of my parts this week and spend Saturday starting the soldering process. Things went pretty smoothly as I took my time on the surface mount components and only had a small mistake on a resistor and mosfet where I wasn't paying close enough attention to the directions. Luckily I was able to fix those mistakes without a really major heartache. Tomorrow I may connect the LCD. I forgot to order a part so it's gonna be another week probably before I can mount the Raspberry Pi and HeaterMeter boards together for full operation. I'm considering building another unit that isn't as fancy (i.e. 2 line LCD) and seeing if anyone wants to buy it. Pictures of my soldering job have been attached.
Update: I have built a complete second unit and have it operational now as well. The LCD I ordered from Ebay was partially damaged so I'm awaiting a new LCD to complete it without defects. I will sell this unit or keep it as a backup.
The Smokin-It #2 modifications
It's now February 23rd and I completed my smoker modifications last night. The HM has been completed for about a week and I just got back from vacation so it was time to finish up the project. Here's some pics:


Background Information:
What is the HeaterMeter PID Controller?
A PID Controller is control loop feedback mechanism. In BBQ smokers it is basically a device with an algorithm that monitors temperatures of your smoker/pit and provides a method of controlling your heat to maintain your desired setpoint(s) as accurately and stably as possible. The HeaterMeter PID Controller is a development project started up by Bryan Mayland (aka CapnBry) that is geared for the Big Green Egg (BGE). This project is gaining traction and continually evolving with improvements and new adaptations due to the great community of developers and users. The current version I will use for the basis of this thread is v4.2.4. I applaud Bryan for the great foundation work he has provided and hope everyone here at smokingitforums can consider it a viable future option for their temperature sensor and PID controller needs. Please visit the following links to learn more about the HeaterMeter PID controller:
Why would I want one?
Most Smoking-It owners want to become king of "Lazy-Q", am I right? The HeaterMeter costs roughly $200 +/- $50 (labor and time costs to build excluded) depending on features and quality of components used in the building process. This is in the same financial investment ballpark as the current Auber PID's that so many users on this forum invest in. It is my belief (will know when I finish this project build) that the HeaterMeter will be more capable and feature rich than the Auber. Please be aware that this comes at the expense of more complex and challenging setup conditions. Once everything is setup and tuned it should be "smooth" sailing on the BBQ train while you drink more beers "slaving over dinner"!

Here's a few previews of what's on the horizon:
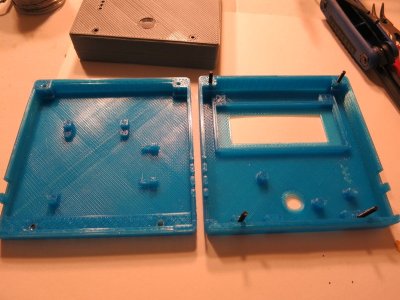
- Custom 3D printed case for modified 4-line LCD HeaterMeter Pit/Probe status monitoring


- Real time Pit/Food monitoring from anywhere!


- Wowing your family/friends with a BBQ and Beer science lesson!


HeaterMeter Build and Integration Plans:
4-Line LCD w/Thermocouple and 3 probe support
I settled on this configuration because I plan to modify my SI2 smoker to utilize a permanent "Pit" probe thermocoupler similar to what the Auber PID controller installers within this forum typically install in their units. I plan to maintain legacy analog and new heatermeter PID controller functionality by way of installing a bypass DPDT ON-ON waterproof switch. I wanted to dedicate a quality pit probe and 2 food probes for my smokes. Having the room for the 3rd additional probe port in the HeaterMeter was just icing on the cake. I really wanted complete visibility to my smokes through the LCD and Wireless (Wi-Fi) interfaces. This allows me to real time monitor my smokes anywhere/anytime so I'm not constrained to being near the BBQ all the time. Finally, I wanted to help the HeaterMeter project bridge the gap into supporting electric smokers through the addition of adding a solid state relay (SSR). This should really open up my "Lazy-Q" visions. And I love technology and tinkering so why the hell not try a project like this?
I want to be as open and transparent as possible so followers can make reasonable and accurate assumptions based on their experience levels, willingness to try new things, and budgetary estimates of what to expect based on what they have and need to make this a success. I knew going into this project that I would be spending a fair amount more than the standard costs because I needed some tools and things I haven't used in years (e.g. soldering iron and other electronic tools and supplies). I also realize I'll probably spend quite a few hours re-learning stuff I haven't used in practice since my college days. I hope to pay close attention and remember enough things that prevent myself from making any significant and costly mistakes.
Parts and Pricing - My experience
| Item | Price | Qty | Shipping | Total | Link |
| Soldering Station | 59.99 | 1 | 0.00 | 59.99 | Link |
| Solder 60/40 Rosin Core | 28.99 | 1 | 0.00 | 28.99 | Link |
| HM v4.2.4 PCB | 14.00 | 1 | 2.00 | 16.00 | Link |
| Raspberry Pi A+ | 24.99 | 1 | 0.00 | 24.99 | Link |
| 20x4 LCD | 10.49 | 1 | 0.00 | 10.49 | Link |
| USB Wifi Adapter | 8.99 | 1 | 0.00 | 8.99 | Link |
| 32GB Micro SDHC | 15.99 | 1 | 0.00 | 15.99 | Link |
| 12VDC 1A Power Supply | 5.99 | 1 | 0.00 | 5.99 | Link |
| ThermoWorks probes | 16.00 | 2 | 4.99 | 36.99 | Link |
| Solid State Relay (SSR) | 12.17 | 1 | 0.00 | 12.17 | Link |
| DPDT Toggle Switch | 2.66 | 1 | 0.00 | 2.66 | Link |
| PCB & Thermo Parts | 38.26 | 1 | 4.99 | 43.25 | Link |
| Probe Jacks | 0.87 | 10 | 3.38 | 12.06 | Link |
| TC Connector & resistors | 2.07 | 2 | 6.14 | 10.28 | Link |
| TC Mini Connector | 3.30 | 1 | 0.00 | 3.30 | Link |
| TC 4" Probe | 11.95 | 1 | 7.38 | 19.33 | Link |
| Grand Total | 311.47 |
This is my total cost so far and I'm missing a case and one small part I missed, so add ~($30+$2). My numbers may not be reflective of others who may already have some of the expensive equipment like electronic supplies and thermo probes. Average kit should be around $200 to complete + some labor of soldering/debugging. I went with high end everything like 2 - Thermoworks food probe thermistors, Thermocouple that will permanent mount in my smoker, 4 line LCD, etc...
The HeaterMeter Build Process
So I received the majority of my parts this week and spend Saturday starting the soldering process. Things went pretty smoothly as I took my time on the surface mount components and only had a small mistake on a resistor and mosfet where I wasn't paying close enough attention to the directions. Luckily I was able to fix those mistakes without a really major heartache. Tomorrow I may connect the LCD. I forgot to order a part so it's gonna be another week probably before I can mount the Raspberry Pi and HeaterMeter boards together for full operation. I'm considering building another unit that isn't as fancy (i.e. 2 line LCD) and seeing if anyone wants to buy it. Pictures of my soldering job have been attached.
Update: I have built a complete second unit and have it operational now as well. The LCD I ordered from Ebay was partially damaged so I'm awaiting a new LCD to complete it without defects. I will sell this unit or keep it as a backup.
The Smokin-It #2 modifications
It's now February 23rd and I completed my smoker modifications last night. The HM has been completed for about a week and I just got back from vacation so it was time to finish up the project. Here's some pics:


